Unleash the green thumb in you with our detailed guide on planting Danvers carrots. These sweet, crisp, and hearty vegetables are a staple in kitchens across the world, offering both nutritional value and versatility in cooking. However, they need specific growing conditions to thrive. In this guide, we will navigate through the steps of planting Danvers carrots, from understanding their unique needs to harvesting these delicious roots.
Introduction:
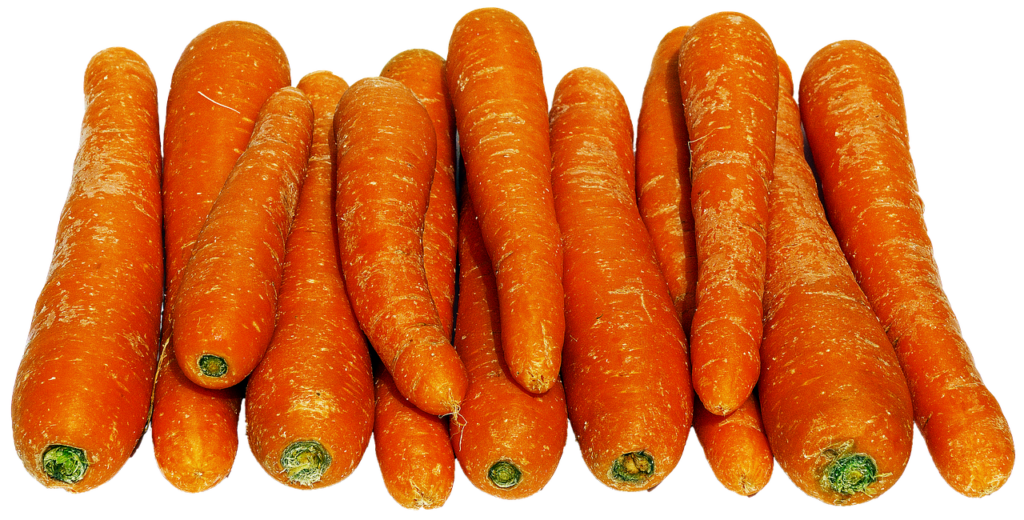
Originally developed in the town of Danvers, Massachusetts in the 19th century, Danvers carrots are a popular variety known for their rich flavor, deep orange color, and adaptability to various soil types. They’re often characterized by their conical shape, wide shoulders, and strong tops that make them easy to pull from the ground.
Growing your own vegetables, like Danvers carrots, can be both a rewarding and practical endeavor. Homegrown produce tends to be fresher, healthier, and more flavorful than what you find at the supermarket. Plus, gardening can be a therapeutic activity, offering benefits like stress relief and improved mental health. By growing Danvers carrots in your backyard or even in containers, you get to enjoy these benefits while ensuring a steady supply of this nutritious and versatile vegetable.
In the following sections, we’ll delve deeper into the world of Danvers carrots – from understanding their growth requirements to guiding you through the planting process and finally, how to harvest and store your homegrown bounty. Let’s get started!
Understanding Danvers Carrots
History and Origin of Danvers Carrots
The Danvers carrot, as its name implies, was developed in the 1870s in Danvers, Massachusetts. It is a product of the market gardeners and farmers in that region who sought to create a carrot variety that could thrive in the heavy clay soils common in the area. The result was a carrot with a conical shape, strong tops, and a rich, sweet flavor that quickly gained popularity.
Over time, the Danvers carrot has been further refined and improved, leading to the varieties we see today – like the Danvers Half Long and Danvers 126. These varieties retain the characteristics of their progenitor, making them a favorite among home gardeners and commercial growers alike.
Nutritional Profile and Uses in Cooking
Danvers carrots are not just tasty, they’re also packed with nutrients. They are an excellent source of beta-carotene, a type of vitamin A that’s good for your eyesight. They also provide vitamin K, vitamin C, and dietary fiber, among other nutrients.
In terms of cooking, Danvers carrots are incredibly versatile. They can be eaten raw in salads, cooked in soups and stews, roasted for a side dish, or even juiced for a healthy drink. Their sweet flavor intensifies when cooked, making them a great addition to a variety of dishes.
Furthermore, due to their robust tops and ease of pulling from the ground, they are ideal for those who want to try their hand at pickling. Pickled carrots, especially those made from Danvers, can serve as a tangy, crunchy accompaniment to meals or can be enjoyed as a snack on their own.
So whether you’re a novice gardener looking to start a vegetable patch, or a seasoned grower seeking to diversify your crop, Danvers carrots are a worthwhile addition to your garden. In the next section, we’ll guide you through the process of planting these carrots, ensuring a successful harvest.
Ideal Conditions for Growing Danvers Carrots

Appropriate Climate and Temperature
Danvers carrots, like most carrot varieties, are cool-season vegetables. They thrive best in temperatures between 60°F and 70°F but can tolerate temperatures as low as 40°F. While they can survive some heat, extremely hot conditions may cause the roots to become woody or bolt prematurely.
It’s best to plant Danvers carrots in early spring or late summer for a fall harvest. In mild winter regions, you can also plant them in the fall for a winter harvest.
Soil Quality and Preparation
Soil preparation is crucial for growing Danvers carrots. They prefer loose, sandy, well-draining soil with a pH between 6.0 and 6.8. The deep, loose soil allows the roots to grow long and straight, while the slightly acidic pH promotes optimal nutrient uptake.
Before planting, prepare your garden bed by removing any rocks, sticks, or hard clumps of soil that could obstruct the carrot’s growth or cause it to fork. Adding organic matter, such as compost or well-rotted manure, can improve both the texture and nutrient content of your soil.
Avoid using fresh manure or high-nitrogen fertilizers, as these can cause carrots to produce more foliage at the expense of the roots.
Sunlight Requirements
Danvers carrots need plenty of sunlight to grow well – ideally, at least six hours of direct sunlight each day. However, they can tolerate partial shade, especially in hotter regions where intense afternoon sun might be too harsh.
Ensure your chosen planting site meets these requirements for best growth. If you’re growing carrots in containers, you have the advantage of being able to move them around to catch the best light.
Stay tuned for the next section where we will guide you through the process of planting your Danvers carrots.
Planting Danvers Carrots
When to Plant Danvers Carrots
As a cool-season crop, Danvers carrots are typically planted in early spring, as soon as the soil can be worked, or in late summer for a fall harvest. In milder climates, you can also sow them in the fall for a winter harvest. The goal is to allow the carrots to mature in cool weather, which helps develop their sweet flavor.
How to Plant Danvers Carrot Seeds
To plant Danvers carrot seeds, follow these steps:
- Prepare the soil by removing any rocks or debris and breaking up any hard clumps. Add well-rotted compost or organic matter if necessary to improve soil texture and fertility.
- Make shallow furrows in the soil about 1/4 inch deep and 2 to 3 inches apart.
- Sprinkle the carrot seeds thinly along the furrows. Aim to have about 2 to 3 seeds per inch.
- Gently cover the seeds with soil, taking care not to bury them too deeply.
- Water the newly sown seeds gently but thoroughly. The soil should be kept consistently moist until the seeds germinate.
Tips for Ensuring Successful Germination
Carrot seeds can take anywhere from 1 to 3 weeks to germinate, and they require consistent moisture during this period. To help maintain soil moisture, you can cover the seedbed with a layer of straw or a board. Just remember to remove the cover as soon as the seedlings start to emerge.
Another tip is to plant radish seeds along with your carrot seeds. Radishes germinate quickly and will help break the soil surface, making it easier for the slower-germinating carrots to push through. Plus, by the time the radishes are ready to harvest, the carrots will still be small, leaving them plenty of room to grow.
Caring for Your Danvers Carrots
Watering Schedule and Techniques
Carrots require even, consistent watering for optimal growth. Aim to provide at least 1 inch of water per week, either through rainfall or manual watering. The soil should be kept moist but not waterlogged, as overly wet conditions can lead to root rot.
When watering, it’s best to use a gentle spray to avoid disturbing the seeds or young seedlings. As the carrots mature, deeper watering is beneficial to encourage the roots to grow downward.
Fertilizer Needs and Application
Danvers carrots generally do well with an initial application of a balanced, slow-release fertilizer at planting time. Avoid high-nitrogen fertilizers, as they can lead to excessive leaf growth at the expense of root development.
As the plants grow, side-dress with compost or another organic fertilizer every 2-3 weeks to continually replenish nutrients in the soil. Always water thoroughly after applying any fertilizer to help it reach the root zone.
Pest Control and Common Diseases
Common pests that affect carrots include carrot rust flies, wireworms, and aphids. Implement crop rotation and use floating row covers to prevent these pests from reaching your carrot crop.
Carrots can also be affected by diseases like carrot leaf blight and root-knot nematodes. Plant disease-resistant varieties, maintain good air circulation around your plants, and practice proper crop rotation to help prevent these diseases.
Harvesting Danvers Carrots
Signs That Your Carrots Are Ready for Harvest
Danvers carrots are typically ready for harvest 65 to 75 days after planting. The best indication that your carrots are ready to harvest is their size. The tops of the roots should be about 1 to 2 inches in diameter at the soil surface.
Another sign is the color of the carrot. Danvers carrots are a deep orange when mature. If you’re unsure, you can gently remove some of the soil around the top of one carrot to check its color and size.
How to Harvest Without Damaging the Plant
When harvesting your Danvers carrots, gently loosen the soil around the root using a garden fork or your fingers. Then, grasp the plant near the base of the foliage and pull it straight up. Be careful not to twist or yank the plant, as this can break the root.
If the soil is very hard, you may need to water it first to make harvesting easier. In very heavy soil, it’s sometimes better to use a spading fork to lift the carrots out.
Proper Storage and Preservation Methods
After harvesting, remove the tops, leaving about 1 inch of green stem. This helps prevent the carrots from drying out. Don’t wash the carrots until you’re ready to use them; washing can remove beneficial bacteria that help prevent decay.
Store your harvested carrots in a cool, humid place, like a refrigerator or a root cellar. Place them in perforated plastic bags, or wrap them in damp paper towels and then place them in a plastic bag.
For long-term storage, you can also freeze or can your carrots. To freeze, you’ll need to blanch them first by boiling them for 2 minutes and then quickly cooling them in ice water. Drain and pack into freezer bags or containers, leaving no air space. To can, follow safe home canning procedures using a pressure canner.
Conclusion
Planting and caring for Danvers carrots can be a rewarding experience, offering you the opportunity to enjoy homegrown vegetables that are delicious, nutritious, and far superior to anything you can buy at the store.
We’ve covered all the key points needed for successful cultivation:
- The best time to plant Danvers carrots is in early spring or late summer, allowing them to mature in cool weather.
- Proper soil preparation and planting techniques are essential, including making shallow furrows and sowing seeds thinly.
- Consistent watering and appropriate fertilization support healthy growth.
- Regular monitoring and proper practices can help to keep pests and diseases at bay.
- Harvesting should be done carefully when the carrots are a deep orange color and about 1 to 2 inches in diameter at the soil surface.
- After harvest, proper storage and preservation methods will ensure you can enjoy your carrots for months to come.
Growing your own vegetables doesn’t just provide fresh produce; it also offers a sense of accomplishment and connection to nature. Whether you have a large garden plot or a small container garden on your patio, growing Danvers carrots is a great way to start. So why wait? Grab some seeds, get your hands dirty, and experience the joy of growing your own food.
Frequently Asked Questions (FAQs)
Can I plant Danvers carrots in a container?
Yes, Danvers carrots can grow well in containers. The depth of the container should be at least 12 inches to accommodate the length of the carrot roots.
How can I tell if my soil is suitable for growing carrots?
Carrots prefer well-drained, sandy or loamy soil. You can conduct a soil test to determine its texture and nutrient content. Amend heavy clay soil with organic matter to improve its structure and drainage.
What should I do if my carrots are splitting or cracking?
Splitting or cracking is often due to inconsistent watering. Maintaining a regular watering schedule can help prevent this problem.
Why are my carrot tops large and lush but the roots small?
This may be due to overly high nitrogen levels in your soil. Use a balanced, slow-release fertilizer and avoid over fertilizing.
How long can I store harvested carrots?
In a cool, humid environment like a refrigerator or root cellar, carrots can last for several months. If you opt for freezing or canning, they can be stored for up to a year.
Can I use carrot greens in my cooking?
Yes, carrot greens are edible and can be used in a variety of dishes such as pesto, soups, and salads. However, some people may find the taste a bit bitter.
Sources
- Gardeners Path
- Ferry Morse
- Hudson Valley Seed
- Gardening Know How
- San Diego Seed Company
- Seed Savers Exchange
- Smart Gardener*